Growing up ice cream was always a thing. Soft serve was my favorite. My dad liked rocky road or New York Super Fudge Chunk, or NYSFC for short. He is a loyal man and prefers Ben and Jerry's over most. Ice cream, or 'scream', as he did and still does call it was never in short supply. I have always been partial to east coast ice cream, even the crappy stuff. I mean has anyone else ever had the Red Sox Ice Cream, with tiny chocolate sox, chocolate ice cream, and fudge? Generally I am an ice cream purist, but this, if they even still make it, is insane in the best kind of way. I don't know why it's taken me so long to put my (it's not really mine, but for the time being successfully commandeered) Ice Cream maker to use.
But now that I've started I don't know if I can stop.
Today I made a list of potential future 'scream' flavors on the dry erase board that's sitting on my kitchen counter. In addition, there's also a note that says: create positivity! because sometimes you need that too. In the last five minutes while writing this I have also contemplated putting on Christmas music...twice. I think it has something to do with the ice cream I made and ate yesterday, or how I really want it to snow.
I am very sad all the ice cream is gone.
Salted Rye Ice Cream
I played with a couple different recipes and only used a little over a tablespoon of Rye, but you can use up to three tablespoons according to most people, and still end up with ice cream. Also the alcohol helps give the ice cream a softer texture, which I like. I made a custard (egg based base). I like the cream cheese version too, but I didn't have any. I used brown sugar too, because the caramel notes complement the rye, and mostly because I was low on the white stuff. Ice cream is pretty forgiving if you are down to experiment with the outcome. Part science, part experiment, and most certainly delicious.
Get ready for ice cream everyone, lots and lots of ice cream.
Wednesday, October 23, 2013
Sunday, September 1, 2013
Summer, now and past, and a million apologies.
The weather here is still great. There have been the occasional long sleeved nights and one or two mornings that called for a rain coat, but really it isn't over yet. What I really mean to say is I'm sorry. This apology is mainly for me, but when I looked back and say I last wrote about Popsicles in June and it's now September 1st, I felt very, very guilty. I guess that's what happens to summers- they slip by. Sometimes lazily and sometimes in a blink. The best part though is what lingers. As a young child I remember get dressed to go skiing in depths of winter, pulling my many pairs of long underwear over a pale belly and legs and arms still so kissed with sun, that hardly faded until early spring. Now that I am older, and live in Seattle where my tan (if there ever was one) has already faded, I will wake to wintry mornings and a freezer full of preserved fruit. I am of course still ridiculously afraid of botulism, but am working hard to over come that fear. I can't even imagine how much summer will linger once I do.
My family was never really one for family vacations. The few I do remember occurred deep into the middle of winter. While I was sometimes jealous of other peoples summer vacations, I've come to realize that the reason we never wandered far was because there really was no place else as beautiful. Rural New England in the summer, the vast expanse of our natural playground extending across New Hampshire, Vermont, and Maine was in and of itself vacation enough. Backyards full of blueberries, endless loops on your bicycle, the rivers and ponds for morning, afternoon, and evening swims. Some of my favorite memories are from summer camp, where I spent one precious month of every summer for five years on Lake Coniston, a lake almost unidentifiable, but still to this day one of the most beautiful places I've ever been.
Really what I am getting at is the essence of summer. It's how you choose to spend your days. It's the things you remember long after they are gone and the things that bring it all crashing back. For me, it's marshmallows. There is nothing more charming and wonderful than an s'more.
So in celebration of another well spent summer that is sure to linger I give you these fancy s'mores:
These days summers don't really mean vacation, but they still mean a lot of good people, picnics, bbqs, and the occasional birthday-rainy-day-late-summer-indoor-fire-pit.
My family was never really one for family vacations. The few I do remember occurred deep into the middle of winter. While I was sometimes jealous of other peoples summer vacations, I've come to realize that the reason we never wandered far was because there really was no place else as beautiful. Rural New England in the summer, the vast expanse of our natural playground extending across New Hampshire, Vermont, and Maine was in and of itself vacation enough. Backyards full of blueberries, endless loops on your bicycle, the rivers and ponds for morning, afternoon, and evening swims. Some of my favorite memories are from summer camp, where I spent one precious month of every summer for five years on Lake Coniston, a lake almost unidentifiable, but still to this day one of the most beautiful places I've ever been.
Really what I am getting at is the essence of summer. It's how you choose to spend your days. It's the things you remember long after they are gone and the things that bring it all crashing back. For me, it's marshmallows. There is nothing more charming and wonderful than an s'more.
So in celebration of another well spent summer that is sure to linger I give you these fancy s'mores:
These days summers don't really mean vacation, but they still mean a lot of good people, picnics, bbqs, and the occasional birthday-rainy-day-late-summer-indoor-fire-pit.
Thursday, June 20, 2013
For the love of sprinkles, let's talk about Ice Cream.
I just returned from Vermont where I spent four days visiting my two older sisters, my dad, and my new nephew. Among the not so long list of things to do in Vermont, standouts included lots of baby time, eating lots of things with maple syrup, looking at stone walls, watching hot air balloons, playing with farm animals, more baby time, and of course eating lots of soft serve ice cream.
In fact, I even visited the Whippi Dip, my first "restaurant" job in which I flipped burgers, twirled cones, and scooped sundaes. I won't lie to you, back in the day I was the Queen of the Whippi Dip. Despite being hot, sticky, and generally disgusting all summer long, those two summers of ruling the Dip instilled in me a long lasting love of soft serve ice cream. And of course rainbow sprinkles...
I ate a lot, a lot, of soft serve. Considering the time constraints, I really tried to do my part to contribute to the local, small-town economy. Personally, I'm not a fan of the twist, I prefer plain chocolate or vanilla in a cone with a side dish of rainbow sprinkles for consistent sprinkle coverage. It's a method I've developed over the years. Laugh all you want, but it's delicious.
There's also something fairly satisfying about eating it in the car it feels more summery that way, but I won't hold you to it. While I am working on my plans for soft serve in Seattle, I've been working on something that's almost just as good. Or rather, it's good in a different way, and I won't tell if you dip them in sprinkles.
Salted Chocolate Fudgesicles.
I probably have to call them Fudge Popsicles, or Fudge Pops or something like that, but just for the purpose of being a descriptive nomenclator, they really are Fudgesicles. I didn't grow up in a town with an Ice Cream truck, but if I did, I think this is all I would have wanted...
This recipe is adapted from On a Stick
1/4 cup milk chocolate chips (I used Valdrona Chocolate)
2/3 cup sugar
2 tablespoons cornstarch
3 tablespoons unsweetened cocoa powder
2 1/2 cups whole milk
1 teaspoon vanilla extract
1 teaspoon plus a pinch salt
1 tablespoon butter
Melt chocolate until smooth using a microwave in short bursts, or the stove using a heavy sauce pan and a very low temp. Stir in sugar, cornstarch, cocoa powder, milk, vanilla, and a teaspoon of salt and cook over medium heat until mixture thickens. The originally recipe says ten minutes, but it took me around five minutes. The mixture at this point should look like pudding. Let mixture cool slightly and add remaining pinch of salt. Stir and then pour into Popsicles molds (depending on you mold size 8 to 16 Popsicles). Place in freezer and let freeze for 30 minutes. After 30 minutes add Popsicle sticks and continue to freeze until fully frozen.
To remove place molds in hot water and rotate Popsicles sticks slightly until fudgesicle pops out.
Cheers!
In fact, I even visited the Whippi Dip, my first "restaurant" job in which I flipped burgers, twirled cones, and scooped sundaes. I won't lie to you, back in the day I was the Queen of the Whippi Dip. Despite being hot, sticky, and generally disgusting all summer long, those two summers of ruling the Dip instilled in me a long lasting love of soft serve ice cream. And of course rainbow sprinkles...
I ate a lot, a lot, of soft serve. Considering the time constraints, I really tried to do my part to contribute to the local, small-town economy. Personally, I'm not a fan of the twist, I prefer plain chocolate or vanilla in a cone with a side dish of rainbow sprinkles for consistent sprinkle coverage. It's a method I've developed over the years. Laugh all you want, but it's delicious.
Salted Chocolate Fudgesicles.
I probably have to call them Fudge Popsicles, or Fudge Pops or something like that, but just for the purpose of being a descriptive nomenclator, they really are Fudgesicles. I didn't grow up in a town with an Ice Cream truck, but if I did, I think this is all I would have wanted...
This recipe is adapted from On a Stick
1/4 cup milk chocolate chips (I used Valdrona Chocolate)
2/3 cup sugar
2 tablespoons cornstarch
3 tablespoons unsweetened cocoa powder
2 1/2 cups whole milk
1 teaspoon vanilla extract
1 teaspoon plus a pinch salt
1 tablespoon butter
Melt chocolate until smooth using a microwave in short bursts, or the stove using a heavy sauce pan and a very low temp. Stir in sugar, cornstarch, cocoa powder, milk, vanilla, and a teaspoon of salt and cook over medium heat until mixture thickens. The originally recipe says ten minutes, but it took me around five minutes. The mixture at this point should look like pudding. Let mixture cool slightly and add remaining pinch of salt. Stir and then pour into Popsicles molds (depending on you mold size 8 to 16 Popsicles). Place in freezer and let freeze for 30 minutes. After 30 minutes add Popsicle sticks and continue to freeze until fully frozen.
To remove place molds in hot water and rotate Popsicles sticks slightly until fudgesicle pops out.
Cheers!
Saturday, March 30, 2013
Finally, Biscuits
Well it's about time. I've finally figured it out. Buttermilk Buiscuts, that is.
A lot of my favorite combinations involve biscuits. Biscuits and jam. Strawberries and biscuits. Biscuits and Maple Syrup. I could go on and on. But here's the thing, I've never been able to make them. Sure, I've tried a million times and some were fine, some were ok, and some were just awful. I've tried all kinds of recipes. Some were simple and some involved all sorts up-your-sleeve-tricks. I even tried one that swore by adding hard boiled egg yolks to the biscuit dough before baking. It didn't work.
But then I found this recipe and well, nothing else matters.
They're flaky, tall, and split perfectly in half with just a slight twist of the wrist. I can't even begin to list all of things I want to make these for or with. But, I do know they'll be sticking around. I finally found them and I don't plan on trying any other way. These are just too easy, and too good.
A lot of my favorite combinations involve biscuits. Biscuits and jam. Strawberries and biscuits. Biscuits and Maple Syrup. I could go on and on. But here's the thing, I've never been able to make them. Sure, I've tried a million times and some were fine, some were ok, and some were just awful. I've tried all kinds of recipes. Some were simple and some involved all sorts up-your-sleeve-tricks. I even tried one that swore by adding hard boiled egg yolks to the biscuit dough before baking. It didn't work.
But then I found this recipe and well, nothing else matters.
They're flaky, tall, and split perfectly in half with just a slight twist of the wrist. I can't even begin to list all of things I want to make these for or with. But, I do know they'll be sticking around. I finally found them and I don't plan on trying any other way. These are just too easy, and too good.
Tomorrow I am brining them to brunch. I hear there will will be gravy and ham- but honestly I'll probably just eat mine with Jam. So however you like em', here you go...
Tuesday, March 26, 2013
New Tricks
Over the last few months, I've been up to a lot and I've been up to nothing, all at the same time. The upside about an injury is that you have a lot of time to read and bake and mostly just putz around. The truth is, I like to putz. But I'm quickly learning I like to intermittently putz around. When those moments where you have nothing to do are sprinkled between moments when you have a lot to do. Mostly, I miss having a lot to do. Luckily, my days of lounging are winding down. With a little luck and lots of elbow grease, after three weeks of physical therapy, I'll be back at it. Well, back at a lot of it, and back to enjoying those periodic moments with nothing to do and nowhere to go.
Don't get me wrong, I feel like I've been using my time. Most of my allotted standing time has been spent in my kitchen. Nothing too fancy, just old recipes with new tricks.
Like theses. The peanut butter cookies I've made forever, with some new milk chocolate chips.
Don't get me wrong, I feel like I've been using my time. Most of my allotted standing time has been spent in my kitchen. Nothing too fancy, just old recipes with new tricks.
Like theses. The peanut butter cookies I've made forever, with some new milk chocolate chips.
Or this lemon tart, now with a whole wheat short bread crust.
So, I'll admit a good bit of all this has been fun and I've definitely learned some things. Some valuable things. I've learned that these peanut butter cookies really are better with chocolate chips and that four year old boys really appreciate scooping out the dough and picking out all the chocolate chips. I've also learned that I am obsessed with whole wheat short bread crusts. Like really really into everything about them-- texture, taste, and color.
I've got some work to do, but hey- I've got some time.
Monday, March 11, 2013
The last of the huckleberries
As a kid we had several blueberry bushes in our yard, mostly they were just for show, the birds would eat most of the bounty, but we were never short of berries. Between the backyard and our down the street neighbors Pick-your-own-blueberry farm, our pancakes never went without and our freezer was full all winter long. My sister used to eat the frozen berries straight from the bag until her teeth and fingers were numb and her hands and mouth stained a purple you were sure would last weeks.
I, on the other hand, preferred the cakes and breads and pies. I'm still a firm believer in blueberries and this summer when I return home to the east coast to visit my oldest sister and her newest baby boy, I fully intend on eating my fair share-- and then some.
But, for the past two summers, as I've made my home here in the Pacific Northwest, I've developed a taste for a new type of berry... Huckleberries. At the end of last summer I had five pounds in my freezer and despite surviving a move across town, I am finally nearing the last of the huckleberries.
In fact, I'm pretty sure this will be the last baked good I make with them- I have plans to use the leftovers to make huckleberry sipping vinegar for summer cocktails. Huckleberry and Gin anyone? But until then I leave you with yet again another dessert you can justifiably eat for breakfast.
Huckleberry Crumb Bars.
This recipe is adapted from Smitten Kitchen's adaptation of this recipe from Allrecipes. I liked the first adaptions, but cut down the sugar and upped the lemon a little, to brighten up my frozen huckleberries. Also, since my berries were frozen I kept them that way, but if you have fresh ones, use those.
1 cup sugar
3 cups all purpose flour
1 teaspoon baking powder
1/4 teaspoon salt
8 ounces butter (cold)
1 egg
zest of one lemon
1/3 cup sugar
1 1/2 tablespoons lemon juice
3 tablespoons cornstarch
4 cups (frozen) huckleberries
Preheat oven to 375 degrees and grease a 9x13 inch pan
In a bowl mix together 1 cup sugar, flour, and baking powder, then add salt and lemon zest. Work in cold butter and egg with a knife or pastry cutter. The dough will be crumbly, however take care not to leave large chunks of butter. Pour half of the dough into the prepared pan and press it down, with your fingers is fine, to form a bottom crust. Set aside.
In a medium bowl mix 1/3 cup sugar, lemon juice, and cornstarch until the corn starch is well incorporated. Mix in berries. Spread berries evenly over bottom crust. Crumble the remaining crust over top, but do not press down
Bake for 45 minutes or until top is slightly golden brown. Let chill completely before cutting.
In a medium bowl mix 1/3 cup sugar, lemon juice, and cornstarch until the corn starch is well incorporated. Mix in berries. Spread berries evenly over bottom crust. Crumble the remaining crust over top, but do not press down
Bake for 45 minutes or until top is slightly golden brown. Let chill completely before cutting.
Until next summer, I bid you adieu, Huckleberries. You'll be missed.
Monday, February 11, 2013
For the days I don't eat cake
It's probably not a surprise, but I really don't like savory breakfast. Some day's I'll have an egg, but only if I get to eat it with pancakes or waffles. Really, I prefer cookies. Sometimes the healthy kind with jam, but somedays (usually Mondays) I go straight for the chocolate chip I often get to take home from work on Sunday nights. Usually there's only a half left over, because contrary to anything any parent or health care professional has told you, chocolate chip cookies make great late night snacks too.
But there comes a day, and it doesn't come often, where you wake up and think-- I should really eat something that is not a cookie for breakfast. For those days, I've discovered this:
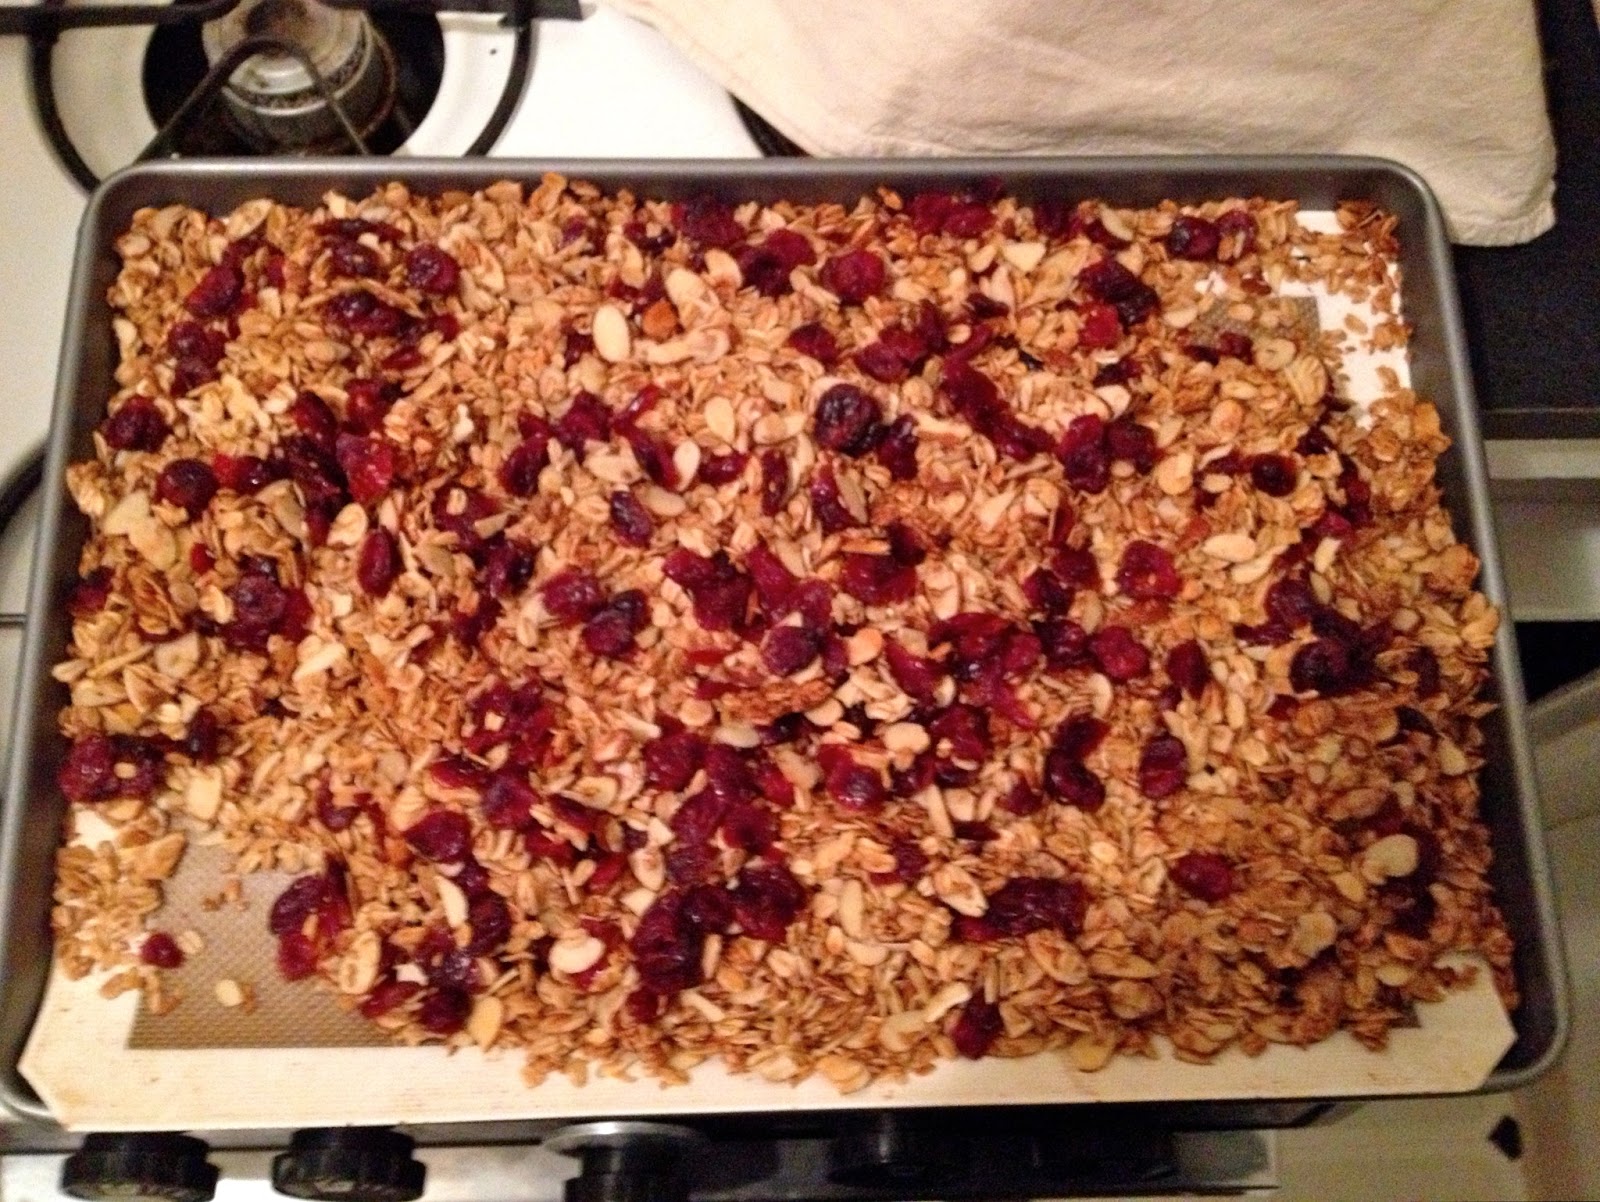
Ginger Granola with Almonds, Flax, and Cranberries.
It's delicious, it really is. Also it makes me eat healthier things in the morning like the goat milk yogurt I've recently become obsessed with. I loosely followed a granola recipe from Bon Appétit and it really is a better granola. I know this doesn't mean a lot from the girl who eats cookies for breakfast, but sometimes I like granola to just be granola. The secret here is the egg white. It gives the granola a good crunch without adding too much of the stuff you'd find in my chocolate chip cookie.... butter...ummmm.
For my version I skipped the brown sugar and used a heavy 1/2 cup of good maple syrup. I also used slivered almonds and toasted flax seeds for my nuts. And added a lot of ground ginger. Next time I make this I may even use two egg whites for even more crunch.
But there comes a day, and it doesn't come often, where you wake up and think-- I should really eat something that is not a cookie for breakfast. For those days, I've discovered this:
Ginger Granola with Almonds, Flax, and Cranberries.
It's delicious, it really is. Also it makes me eat healthier things in the morning like the goat milk yogurt I've recently become obsessed with. I loosely followed a granola recipe from Bon Appétit and it really is a better granola. I know this doesn't mean a lot from the girl who eats cookies for breakfast, but sometimes I like granola to just be granola. The secret here is the egg white. It gives the granola a good crunch without adding too much of the stuff you'd find in my chocolate chip cookie.... butter...ummmm.
For my version I skipped the brown sugar and used a heavy 1/2 cup of good maple syrup. I also used slivered almonds and toasted flax seeds for my nuts. And added a lot of ground ginger. Next time I make this I may even use two egg whites for even more crunch.
The above recipe from Bon Appétit is meant to be experimented with. The only thing I would suggest would be to keep the general proportions of oats, to nuts, to oil, to sugar/syrup.
Here's what I did:
Ginger Almond Flax Granola
2 egg whites, beaten
3 cups oats
1 cup slivered toasted almonds
1/2 cup toasted flax seeds
1/2 teaspoon cinnamon
2 teaspoons ground ginger
1 1/2 teaspoon salt
pinch nutmeg
pinch ground clove
1/4 melted coconut oil (could use olive oil)
1/2 cup maple syrup
1 cup dried unsweetened cranberries (added in after granola is cooked)
Mix all ingredients except cranberries together and cook for about an hour at 300 degrees, stirring and rotating pan every ten minutes. Mostly you are looking for a golden brown color not a crisp, because the granola will continue to crisp as it cools.
Also, I feel like this would make good Christmas gifts (get ready everyone) especially when you put it in pretty jars like this.
Saturday, February 9, 2013
In Celebration
I really like Birthdays. Especially when it's your good friend's and it's one drawn out day of indulgent celebration. Because turning a quarter century old is a big deal and I for one am down for a good PARTY.
Especially a party that involves pizza and lots of dessert.
People have serious opinions about brownies. There are people who like their brownies fudgey, some cakey, some with walnuts, and still others with frosting on top. But whatever your preference, I think we can all agree, we brownie lovers are continuously on the hunt for the most perfect one.
Personally, I like blondies, a whole different kind of brownie, but that's for a different day...
So in celebration of birthdays and the search for the most perfect brownies- I have one to add to the pile.
Salted Caramel Brownies.
I am not sure if these take the award or not. They're a little decedent for your everyday brownie consumption, but I think there just right for birthday celebrations.
I didn't change a thing, and followed this recipe to the tee, both for the brownies and for the salted caramels. The only thing I will suggest, is that my caramels turned out a little on the softer side- and although I don't have anything to compare it too- I liked it. A lot. So don't fret if you plan on making it all in one day and don't have the patience to let your caramels completely set. But, if you do have the time, or are not prone to procrastination, by all means let them get fully firm and then make your batter.
Cheers!
Saturday, January 5, 2013
Year of Happiness
I don't want to knock to 2012, nor do I want to sound cliche, but I am pretty certain 2013 is going to be a great one. A really great one. Mostly because it started with this:
Meyer Lemon Bread Pudding. Right?
It's gonna be a good year. Full of lemons, resourcefulness, and happiness. I never really make resolutions, mostly because I feel all the little things we're supposed to resolve to do, or not do,- eat fewer sweets, run more, be a better person, etc. etc. get old too quickly. But I do like intentions. So for the sake of declarations: this year I intend to live purely in happiness. Oh yeah, that and eat more bread pudding. I've got to say, so far, I'm off to a good start.
It may seem obvious, but the key to good bread pudding lies in, you guessed it, the bread. I used two day old Columbia City Levin bread, which is as delicious fresh as it is in bread pudding. As I've found myself in possession of a decent amount of stale bread lately, bread pudding was the obvious choice. One of the things I like most about bread pudding is how it comes to fruition. It's the proverbial making of lemonade, the spinning of straw to gold version of a dessert. We make the best of what we have, and then we make it better. I didn't even plan this, but really it's a great metaphor for the new year.
Thanks 2012 you were great, but I'll take what you've got and raise you an even better year in 2013.
I'm a firm believer that all things made with Meyer lemons are infinitely better than any similar version made without them. I'm working on scientifically proving it too.
As always, I made lemon curd this way. I doubled the recipe thinking I'd need more than usual, however it wasn't necessary, one batch will be plenty. Side note: Lemon curd freezes well in an airtight container if somehow you can't think of enough other things to eat the leftovers on. So far I've done french toast, a broken piece of leftover chocolate chip cookie, and in honor of a clean slate New Year, a spoon on two separate occasions.
Also, if your lemon custard is a little soft that's totally fine for bread pudding because you'll bake the whole thing over again. In fact, I would suggest undercooked the first time is much much better than taking your custard too far to start. Additionally, I would make your lemon custard the day before or at least several hours before you want to bake the pudding so it has time to set up properly.
Now for the pudding, pudding.
Begin with your bread. I cut up 3/4 of a loaf of Columbia City Levin into one inch squares with the crust still intact. Many recipes call for the de-crusting of the bread, but I think the crust gives the dessert a little more texture. I compensate for the presence of crust by letting my bread soak in the pudding custard for 20-25 minutes before baking it.
Basic Bread Pudding Custard:
4 eggs
1/2 - 3/4 granulated sugar (depending on where you fall on the sweet to sweet-tart scale) I found that since your adding lemon curd you don't need more than 1/2 cup
1/8 teaspoon salt
1 quart whole milk
1 1/2 teaspoons of finely finely diced lemon zest
In a bowl whisk eggs plus 1/4 cup sugar together, set aside. In a sauce pan bring milk and 1/4 sugar to a simmer. Remove from heat and pour into egg mixture slowly while continuously whisky to keep the eggs from cooking. Add salt and lemon zest. Mix to combine. Pour mixture over bread pieces and let sit for 20-25 minutes. I used a large roasting or baking pan for this step to ensure all of the bread was covered in custard.
After the bread has absorbed the majority of the liquid, transfer 3/4 of the bread into a buttered 9 inch cake round. Spread evenly with lemon curd. Cover the curd with the rest of the bread mixture and pour any remaining pudding custard over top. Bake at 350 for 50 minutes or until the top is golden brown and the sides begin to pull away from the edge of the pan. Personally I think bread pudding is best served warm, but be my guest; eat it any way you like.
Hopefully, this recipe goes as perfectly with your new years resolutions as it does with mine...
Meyer Lemon Bread Pudding. Right?
It's gonna be a good year. Full of lemons, resourcefulness, and happiness. I never really make resolutions, mostly because I feel all the little things we're supposed to resolve to do, or not do,- eat fewer sweets, run more, be a better person, etc. etc. get old too quickly. But I do like intentions. So for the sake of declarations: this year I intend to live purely in happiness. Oh yeah, that and eat more bread pudding. I've got to say, so far, I'm off to a good start.
It may seem obvious, but the key to good bread pudding lies in, you guessed it, the bread. I used two day old Columbia City Levin bread, which is as delicious fresh as it is in bread pudding. As I've found myself in possession of a decent amount of stale bread lately, bread pudding was the obvious choice. One of the things I like most about bread pudding is how it comes to fruition. It's the proverbial making of lemonade, the spinning of straw to gold version of a dessert. We make the best of what we have, and then we make it better. I didn't even plan this, but really it's a great metaphor for the new year.
Thanks 2012 you were great, but I'll take what you've got and raise you an even better year in 2013.
I'm a firm believer that all things made with Meyer lemons are infinitely better than any similar version made without them. I'm working on scientifically proving it too.
Also, if your lemon custard is a little soft that's totally fine for bread pudding because you'll bake the whole thing over again. In fact, I would suggest undercooked the first time is much much better than taking your custard too far to start. Additionally, I would make your lemon custard the day before or at least several hours before you want to bake the pudding so it has time to set up properly.
Now for the pudding, pudding.
Begin with your bread. I cut up 3/4 of a loaf of Columbia City Levin into one inch squares with the crust still intact. Many recipes call for the de-crusting of the bread, but I think the crust gives the dessert a little more texture. I compensate for the presence of crust by letting my bread soak in the pudding custard for 20-25 minutes before baking it.
Basic Bread Pudding Custard:
4 eggs
1/2 - 3/4 granulated sugar (depending on where you fall on the sweet to sweet-tart scale) I found that since your adding lemon curd you don't need more than 1/2 cup
1/8 teaspoon salt
1 quart whole milk
1 1/2 teaspoons of finely finely diced lemon zest
In a bowl whisk eggs plus 1/4 cup sugar together, set aside. In a sauce pan bring milk and 1/4 sugar to a simmer. Remove from heat and pour into egg mixture slowly while continuously whisky to keep the eggs from cooking. Add salt and lemon zest. Mix to combine. Pour mixture over bread pieces and let sit for 20-25 minutes. I used a large roasting or baking pan for this step to ensure all of the bread was covered in custard.
After the bread has absorbed the majority of the liquid, transfer 3/4 of the bread into a buttered 9 inch cake round. Spread evenly with lemon curd. Cover the curd with the rest of the bread mixture and pour any remaining pudding custard over top. Bake at 350 for 50 minutes or until the top is golden brown and the sides begin to pull away from the edge of the pan. Personally I think bread pudding is best served warm, but be my guest; eat it any way you like.
Hopefully, this recipe goes as perfectly with your new years resolutions as it does with mine...
Saturday, December 1, 2012
I was meaning to say this earlier, but here you go.
It's the first day of December. I can't believe it. As we leave thoughts of turkey's and cranberry sauce behind, and march on into anticipation of twinkle lights and tinsel (yes, I love Christmas right down to the very last holiday themed napkin), I still have some things to say about Pie.
I've always been a fan of pies that showcase what I love most... sugar. So I thought I would try my hand at a New England specialty. Maple Sugar pie. It's exactly as it sounds. And I have to say it's possibly the best and by the far the sweetest pie I've ever had. I have strong opinions on maple syrup, thoughts that I thoroughly and often express to anyone who will listen, but Sugar Pie may just be the crown jewel, the icing on the cake, the king of the mountain, I could go on, of maple syrup desserts.
The filling is simple. The crumble is easy. The whole thing takes maybe, excluding the crust making, fifteen minutes. I got the recipe from a cookbook aptly tittled Pie, which includes 300 pie recipes from all over the country, compiled by a mustached man who resembles an older looking Brawny man.
The only amendment I made was making a little extra crumble, which I added towards the end of the baking time, mainly to keep the pie looking pretty. Also, I ended up baking the pie for about 40 minutes, despite the author's warning to resist baking over 30 minutes. While I have nothing to compare it to, I don't regret it. Not at all.
Sugar Pie
Adapted from Pie
Crumble:
1 cup flour
3/4 cup packed light brown sugar
1/4 teaspoon salt
1/4 teaspoon cinnamon
6 tablespoons cold unsalted butter, cut into cubes
Mix dry ingredients in bowl and work in butter with hands or pastry cutter until you reach a sand like texture. Pour 1/3 of the crumble on top of a pre-baked pie crust. Side Note: To pre- bake your pie crust make sure your rolled out crust is completely frozen, and make sure you wrap tin foil tightly down over the crust. You can use pie weights, but dried beans work just as well.
Filling:
1 cup Vermont Maple Syrup (the recipe did not say Vermont, but let's get serious here shall we?)
1/2 teaspoon baking soda
1 large egg
1 large egg yolk
1/2 teaspoon vanilla extract
Heat the Maple Syrup over burner until warm, turn off heat and whisk in baking soda, whisk in eggs and vanilla. Pour filling into the shell. Top with the second third of the crumble.
Bake at 350 for 15 minutes then rotate 180 degrees and continue to make for another 10 minutes. Pull pie from oven, spread the rest of the crumble evenly overtop of the pie and bake for the remaining 10 to 20 minutes. Pie will still look considerably jiggly, however it will continue to thicken and set up as it cools and as the crumble expands.
While Sugar Pie can be served warm, I think it's best room temp. Feel free to serve with fresh whipped cream, but make sure it's not too sweet because it's name speaks for itself. It's sweet. Really, really sweet.
Besides the obvious (that it's always amazing, even when it isn't that amazing) to me it's a dessert full of history. Chalk full of tradition and reminders of home. Where I'm from Pie is a thing. Everyone's family has their own version of the standard Apple (cheddar cheese anyone?) and any number of holiday and non holiday reasons to eat them. Don't even get me started on how we feel about our crusts, or rather, the best way to make dough. I imagine there have been hard feelings felt over lard v. butter, or more v. less water debates. However, what I miss most about Vermont, are the truck stops linning I-90 brimming with pie slices of every variety slowly spinning in rotating glass cases. It's fantastic. We all had our favorites. My dad loved chocolate cream. My sister Hazel had a passion for Key Lime pie that persisted above all else. And my oldest sister Rose still prefers pumpkin over pecan.
I've always been a fan of pies that showcase what I love most... sugar. So I thought I would try my hand at a New England specialty. Maple Sugar pie. It's exactly as it sounds. And I have to say it's possibly the best and by the far the sweetest pie I've ever had. I have strong opinions on maple syrup, thoughts that I thoroughly and often express to anyone who will listen, but Sugar Pie may just be the crown jewel, the icing on the cake, the king of the mountain, I could go on, of maple syrup desserts.
The filling is simple. The crumble is easy. The whole thing takes maybe, excluding the crust making, fifteen minutes. I got the recipe from a cookbook aptly tittled Pie, which includes 300 pie recipes from all over the country, compiled by a mustached man who resembles an older looking Brawny man.
The only amendment I made was making a little extra crumble, which I added towards the end of the baking time, mainly to keep the pie looking pretty. Also, I ended up baking the pie for about 40 minutes, despite the author's warning to resist baking over 30 minutes. While I have nothing to compare it to, I don't regret it. Not at all.
Sugar Pie
Adapted from Pie
Crumble:
1 cup flour
3/4 cup packed light brown sugar
1/4 teaspoon salt
1/4 teaspoon cinnamon
6 tablespoons cold unsalted butter, cut into cubes
Mix dry ingredients in bowl and work in butter with hands or pastry cutter until you reach a sand like texture. Pour 1/3 of the crumble on top of a pre-baked pie crust. Side Note: To pre- bake your pie crust make sure your rolled out crust is completely frozen, and make sure you wrap tin foil tightly down over the crust. You can use pie weights, but dried beans work just as well.
Filling:
1 cup Vermont Maple Syrup (the recipe did not say Vermont, but let's get serious here shall we?)
1/2 teaspoon baking soda
1 large egg
1 large egg yolk
1/2 teaspoon vanilla extract
Heat the Maple Syrup over burner until warm, turn off heat and whisk in baking soda, whisk in eggs and vanilla. Pour filling into the shell. Top with the second third of the crumble.
Bake at 350 for 15 minutes then rotate 180 degrees and continue to make for another 10 minutes. Pull pie from oven, spread the rest of the crumble evenly overtop of the pie and bake for the remaining 10 to 20 minutes. Pie will still look considerably jiggly, however it will continue to thicken and set up as it cools and as the crumble expands.
While Sugar Pie can be served warm, I think it's best room temp. Feel free to serve with fresh whipped cream, but make sure it's not too sweet because it's name speaks for itself. It's sweet. Really, really sweet.
Monday, November 12, 2012
Welcome to adulthood.
I have a new apartment.
Let's call this a christening.
Or rather more along the lines of spraying champagne on the deck of your boat (I've been told that's a thing), burning sage, buying an orchid (which I would love someone to do FYI), or smashing dishes- the first cake baked ritual holds its own. It's also much tastier and doesn't involve alcohol soaked walls, although I suspect this particular cake would pair just lovely with some bubbles. Maybe we should try it....
In addition to the new apartment, there's been a lot going on in the past few months. The best part about that sentence is that they're ALL good things. That and for the past two months I've almost exclusively been baking banana bread. Probably at least once a week, if I'm being honest. Sometimes two, if I am being really honest. There must have been something in the air, or water, or maybe it was just that I kept subconsciously (and then very very consciously) buying bananas I knew I would never eat each week. Whatever it was, September and October are officially awash with banana bread. I'm not even sure we're out of the woods yet, I'm not even sick of it, but there are other important things to discuss
Like pears.
I think upside down cake is the grandmother of all cakes. Not in any hierarchical sense, just as in upside down cake is like a grandmother. Specifically, the most infamous pineapple incarnation, screams: eat me, I've been sitting on this counter in your Grandmother's house for a week, and somehow against all odds I am more and more delicious the older I get.
Let's call this a christening.
Or rather more along the lines of spraying champagne on the deck of your boat (I've been told that's a thing), burning sage, buying an orchid (which I would love someone to do FYI), or smashing dishes- the first cake baked ritual holds its own. It's also much tastier and doesn't involve alcohol soaked walls, although I suspect this particular cake would pair just lovely with some bubbles. Maybe we should try it....
In addition to the new apartment, there's been a lot going on in the past few months. The best part about that sentence is that they're ALL good things. That and for the past two months I've almost exclusively been baking banana bread. Probably at least once a week, if I'm being honest. Sometimes two, if I am being really honest. There must have been something in the air, or water, or maybe it was just that I kept subconsciously (and then very very consciously) buying bananas I knew I would never eat each week. Whatever it was, September and October are officially awash with banana bread. I'm not even sure we're out of the woods yet, I'm not even sick of it, but there are other important things to discuss
Like pears.
Poached and caramelized in butter and maple sugar.
Despite, or possibly because of being the most grandmotherly cake, Upside down cake is also very delicious. Or else it is with pears and other things that are not in fact pineapples. I'm sorry to the rest of the world, but pineapples make me too anxious and I've never been all that excited about them.
But I do like pears and I do like my new kitchen. Actually, like is an understatement, I am overwhelmingly enamored with all of it despite the fact that it's tiny and currently holds very little besides pie pans and baking ingredients.
So here's to you adulthood. To small first apartments and even smaller first kitchens. To hopefully not bouncing my deposit check and to forgetting to buy a shower curtain. Here's to it all and here's to cake.
Let's eat.
For this recipe I combined Martha Stewart's holiday sensibility with Smitten Kitchen's ability to consistently deliver a really, really good cake.
Instead of sweetened pineapple juice I used molasses and instead of rum I used bourbon. I also had to adjust the recipe to make more of the actually cake part because I wanted to use a cake pan and not a skillet.
Pear Upside Down Cake.
Adapted heavily from Martha Stewart and Smitten Kitchen
For the Top:
Peal, core, and slice 4 to 5 large ripe pairs. Melt two tablespoons of butter in a large skillet on the stove top. Once the butter melts add the pears in an even layer along the bottom of the skillet. Sprinkle with 3 tablespoons of sugar. I prefer a combination of sugar and granulated maple sugar. Let pears brown and caramelize for several minutes on each side. Arrange pears in the bottom of a buttered cake pan.
For the Batter:
2 1/4 cup all purpose flour
1/2 teaspoon salt
3 teaspoons of baking powder
1 1/2 cup sugar
3 eggs
1 1/4 stick of unsalted butter, slightly softened
2 teaspoons vanilla
1 1/2 tablespoons bourbon
3/4 cup dark molasses
Whisk flour, salt, and powder together in a bowl and set aside. Whip butter in food processor until light and fluffy. Slowly add in sugar and mix. Add in eggs, stirring well after each addition. Add in vanilla and bourbon. Slowly add half of the dry mixture, until just combined. Beat in molasses. Add the last of the dry mixture and stir until just combined. Pour batter over pears and bake at 350 degrees for about an hour.
Let cool in cake pan and then invert onto a plate. This is definitely not the prettiest of pear cakes, but it's mighty tasty and made my apartment smell like caramelized sugar for several hours.
Last but not least, here's to new traditions, because if I know me, the first baked cake christening is not likely to go lightly.
Cheers.
Wednesday, September 12, 2012
For you, I'll bake two.
I know I get excited about produce, but I never realized how apparent it's become until the other day, over lunch, plum cake, and rosé, with a good friend of mine, who mentioned that since me at my most excitable usually has something to do with produce, I should probably just realize that I love this city. We were discussing Seattle and all its merits, discussing thoughts of new cities, and nostalgic thoughts of home. I have a romantic love of New York, and truthfully I'll probably end up there someday- at least for a little bit- but when it comes right down to it, I just don't think I'll ever be able to get over having a plum tree in my backyard. Ever.
It's plum season. You know what that means...
Plum cakes for days. So many plums, cakes, and everything in between, that I just couldn't decide.
So I made two. I've been trying to formulate thoughts on which cake is better, forcing tastes on my friends and coworkers, and concocting all sorts of taste tests, but I just can't. I love them both. Therefore, you get two.
The first- a (semi) traditional Italian Plum Cake is light, fluffy, nutty, and just altogether beautiful. Plus, I just finished Blood Bones and Butter, which I loved, and which stirred up so many desires for travel, Italy, plums, and apricot juice I could hardly stand it. I say semi traditional because I used buttermilk instead of milk in the above recipe, for no real reason other than that's all I had. I like the softness and tang it gives the cake, so for now I'm sticking with it.
The second cake is a bit more rustic and a bit more my style, and if I was forced to choose (absolutely forced), it's maybe just a tad bit better. Plum Corn Meal Cake. Light, fluffy, gritty in the best kind of way, and insanely moist.
I substituted blue cornmeal for the yellow cornmeal in the above recipe because, one, it's delicious and two, it's just better.
Trust me.
But when it comes to the plum cakes it's still a toss up. I like them both. I really do. You can decide.
It's plum season. You know what that means...
Plum cakes for days. So many plums, cakes, and everything in between, that I just couldn't decide.
So I made two. I've been trying to formulate thoughts on which cake is better, forcing tastes on my friends and coworkers, and concocting all sorts of taste tests, but I just can't. I love them both. Therefore, you get two.
The first- a (semi) traditional Italian Plum Cake is light, fluffy, nutty, and just altogether beautiful. Plus, I just finished Blood Bones and Butter, which I loved, and which stirred up so many desires for travel, Italy, plums, and apricot juice I could hardly stand it. I say semi traditional because I used buttermilk instead of milk in the above recipe, for no real reason other than that's all I had. I like the softness and tang it gives the cake, so for now I'm sticking with it.
The second cake is a bit more rustic and a bit more my style, and if I was forced to choose (absolutely forced), it's maybe just a tad bit better. Plum Corn Meal Cake. Light, fluffy, gritty in the best kind of way, and insanely moist.
I substituted blue cornmeal for the yellow cornmeal in the above recipe because, one, it's delicious and two, it's just better.
Trust me.
But when it comes to the plum cakes it's still a toss up. I like them both. I really do. You can decide.
Sunday, September 9, 2012
Now's not really the time.
I have a lot of fruit in my fridge. I've had a lot of fruit for weeks. I can't eat enough of it and while I've been baking with it, really these things are mostly delicious enough on their own.
So I've been baking a lot of cookies. I know now isn't really the time for cookies, but I've been doing it anyways. There is something almost meditative about baking cookies in the morning. The day is young, not too warm yet, and you feel like, covered in flour, you just may be the only person awake. It's a feeling that from time to time can give you goose bumps. Clearly, I haven't done much in the way of real meditation, but this is what I've got and I'm pretty sure it has the same effect. Plus, by the end, you get to eat cookie dough.
I've always been a fan of no nonsense baking. Not cutting corners per say, but baking with a bit of wiggle room, or panache, if you will. I think that's why I am so obsessed with Christina Tosi of Momofuku's Milk Bar. She really doesn't mess around. Also, she doesn't bring her eggs to room temp before adding them to the mix. I've been a fan of doing that for years and have felt guilty about it for just as long. I'm glad someone finally told me it was ok. It's a huge weight off my shoulders. Really, it is.
So with the authority of whatever higher baking Gods that be, here are my new favorite cookies. I've also been thinking they would be really great with some maple soft serve and maybe some bourbon....
Either way they're pretty delicious.
Corn Cookies.
Adapted from the Milk Bar CookBook
Basically the only thing I changed was swapping corn flour (I didn't have any on hand) with stone ground corn meal, the blue kind in particular. I think the corn meal adds a nice grittiness to the cookie and combined with the corn powder gives great texture, crunch, and chewiness all at the same time. Basically, it makes for the perfect cookie trifecta.
And don't worry, I'm determined to get some soft serve soon, but for now you'll have to settle for a cold glass of milk.
So I've been baking a lot of cookies. I know now isn't really the time for cookies, but I've been doing it anyways. There is something almost meditative about baking cookies in the morning. The day is young, not too warm yet, and you feel like, covered in flour, you just may be the only person awake. It's a feeling that from time to time can give you goose bumps. Clearly, I haven't done much in the way of real meditation, but this is what I've got and I'm pretty sure it has the same effect. Plus, by the end, you get to eat cookie dough.
I've always been a fan of no nonsense baking. Not cutting corners per say, but baking with a bit of wiggle room, or panache, if you will. I think that's why I am so obsessed with Christina Tosi of Momofuku's Milk Bar. She really doesn't mess around. Also, she doesn't bring her eggs to room temp before adding them to the mix. I've been a fan of doing that for years and have felt guilty about it for just as long. I'm glad someone finally told me it was ok. It's a huge weight off my shoulders. Really, it is.
So with the authority of whatever higher baking Gods that be, here are my new favorite cookies. I've also been thinking they would be really great with some maple soft serve and maybe some bourbon....
Either way they're pretty delicious.
Corn Cookies.
Adapted from the Milk Bar CookBook
Basically the only thing I changed was swapping corn flour (I didn't have any on hand) with stone ground corn meal, the blue kind in particular. I think the corn meal adds a nice grittiness to the cookie and combined with the corn powder gives great texture, crunch, and chewiness all at the same time. Basically, it makes for the perfect cookie trifecta.
And don't worry, I'm determined to get some soft serve soon, but for now you'll have to settle for a cold glass of milk.
Saturday, September 1, 2012
the in-between days.
I love summer. I love sun and ice cream, summer dresses and midnight swims. I love it all. I also love the fall. Thoughts of new boots, the first needed sweater nights, pumpkin this and that, and scarves. Lots and lots of scarves.
But the time of year I love the most is the in-between days. Here in Seattle we are almost full swing in the middle of this in-between season. The days still mostly summery, the nights and early mornings cool, and the air thick with the first sents of fall. It's a time of utter limbo. Pumpkin beers begin popping up on shelves, I start to crave pumpkin pie, but at the very same time we still have late summer strawberries and field grown tomatoes. Basically, it's the time when a lot of good things- the best things in fact- all collide.
It's the perfect time of year.
It's also the time of year my thoughts begin to be mostly and mainly focused on huckleberries. For me, this season holds a lot of promise. It will be my second huckleberry feast and my second time experiencing the in-between Seattle days. I couldn't be more thrilled. Huckleberries, besides being the perfect fruit for baking- tart, sweet, and small are still new to me, so every time I see them, eat them, or even really think of them I feel like a kid on christmas morning. Each one a tiny present with endless uses and applications.
Mostly I like them in pies. Or in cobblers, or in crumble bars, or in coffee cake, or in spice cake, or, or, or. Ok, so I like them in a lot of things, but in keeping with the tradition of today's post, I have a truly in-between days recipe for you.
Chocolate Pudding Brownies with Huckleberry Jam.
Yep. For real. It's the Jam (literally).
To make the Jam:
I totally made this up so feel free to experiment. My version is how I like most things- on the tart er side of sweet.
2 cups huckleberries
3/4 cups sugar
2 tablespoons tapioca flour
pinch salt
zest and juice from one lemon
Cook all ingredients over medium to medium low heat. Watch it bubble, thicken, and reduce. Pull off heat and let cool. This jam is also good with yogurt, toast, or you know vanilla ice cream.
For the Brownies:
I've made these bad boys before. Adapted from Smitten Kitchen here a few months ago, I called them Cupboard Brownies. I still feel they are the most perfect I need chocolate and I have everything I need brownie, but while licking the batter spoon (I still do that- in fact- sometimes that's the only way I eat desserts) this time around, I was struck by how much the batter looked and tasted like chocolate pudding. You know the kind. Instant, ready in minutes, and in my house growing up a rare treat. I was never one for Jello, but I've gone through some serious instant pudding phases in my life. First when I was eight and loved nothing more than eating the vanilla flavor straight out of the fridge (door ajar) with a spoon almost to large to fit in my mouth. Then again when I was in college and it was about the only thing I "baked." Needless to stay, chocolate pudding helps you write papers, it really does. And after thinking about instant pudding for the past twenty minutes or so, I may just be entering a third pudding stage, but we'll see.
But, back to these brownies. They look like pudding, taste like pudding, and while they are quick and not at all fussey to make, they are far from being instant. Truthfully, that's probably a good thing. I followed the exact same recipe this time as above, except I added another extra pinch of salt to the mixed batter. I think they're perfect now.
So after following these steps, right up to pouring the batter into the greased 8 by 8 pan, spoon your huckleberry jam on top of the chocolate batter and use your spoon or rubber spatula to twirl and mix the jam into the top layer of the brownie. You could mix the chocolate with the jam first before pouring into the pan, but I prefer the swirl method because, once baked, you are left with dense ganache like chocolate brownie on bottom, topped with a layer of juicy jamey chocolate goo. And I do mean goo in the best, most pudding like, rich kind of way. As much as I love instant pudding, I feel very confident in saying that these brownies will best even the best box of jello brand. Very confident.
Also, just as instant pudding is best cold out of the fridge, I find these brownies to be best when cold. I stuck mine in the freezer to speed up the process for 30 minutes and then shifted them to the fridge. Also, they are very rich and and a little sticky because of the jam so I would recommend slicing them like cake and serving with a spoon, or cutting into bite sized pieces, like above.
But whatever you do, instant pudding or not, I think they're pretty good. And given they right mood, they may in fact be perfect.
But the time of year I love the most is the in-between days. Here in Seattle we are almost full swing in the middle of this in-between season. The days still mostly summery, the nights and early mornings cool, and the air thick with the first sents of fall. It's a time of utter limbo. Pumpkin beers begin popping up on shelves, I start to crave pumpkin pie, but at the very same time we still have late summer strawberries and field grown tomatoes. Basically, it's the time when a lot of good things- the best things in fact- all collide.
It's the perfect time of year.
It's also the time of year my thoughts begin to be mostly and mainly focused on huckleberries. For me, this season holds a lot of promise. It will be my second huckleberry feast and my second time experiencing the in-between Seattle days. I couldn't be more thrilled. Huckleberries, besides being the perfect fruit for baking- tart, sweet, and small are still new to me, so every time I see them, eat them, or even really think of them I feel like a kid on christmas morning. Each one a tiny present with endless uses and applications.
Mostly I like them in pies. Or in cobblers, or in crumble bars, or in coffee cake, or in spice cake, or, or, or. Ok, so I like them in a lot of things, but in keeping with the tradition of today's post, I have a truly in-between days recipe for you.
Chocolate Pudding Brownies with Huckleberry Jam.
Yep. For real. It's the Jam (literally).
To make the Jam:
I totally made this up so feel free to experiment. My version is how I like most things- on the tart er side of sweet.
2 cups huckleberries
3/4 cups sugar
2 tablespoons tapioca flour
pinch salt
zest and juice from one lemon
Cook all ingredients over medium to medium low heat. Watch it bubble, thicken, and reduce. Pull off heat and let cool. This jam is also good with yogurt, toast, or you know vanilla ice cream.
For the Brownies:
I've made these bad boys before. Adapted from Smitten Kitchen here a few months ago, I called them Cupboard Brownies. I still feel they are the most perfect I need chocolate and I have everything I need brownie, but while licking the batter spoon (I still do that- in fact- sometimes that's the only way I eat desserts) this time around, I was struck by how much the batter looked and tasted like chocolate pudding. You know the kind. Instant, ready in minutes, and in my house growing up a rare treat. I was never one for Jello, but I've gone through some serious instant pudding phases in my life. First when I was eight and loved nothing more than eating the vanilla flavor straight out of the fridge (door ajar) with a spoon almost to large to fit in my mouth. Then again when I was in college and it was about the only thing I "baked." Needless to stay, chocolate pudding helps you write papers, it really does. And after thinking about instant pudding for the past twenty minutes or so, I may just be entering a third pudding stage, but we'll see.
But, back to these brownies. They look like pudding, taste like pudding, and while they are quick and not at all fussey to make, they are far from being instant. Truthfully, that's probably a good thing. I followed the exact same recipe this time as above, except I added another extra pinch of salt to the mixed batter. I think they're perfect now.
Also, just as instant pudding is best cold out of the fridge, I find these brownies to be best when cold. I stuck mine in the freezer to speed up the process for 30 minutes and then shifted them to the fridge. Also, they are very rich and and a little sticky because of the jam so I would recommend slicing them like cake and serving with a spoon, or cutting into bite sized pieces, like above.
But whatever you do, instant pudding or not, I think they're pretty good. And given they right mood, they may in fact be perfect.
Saturday, August 4, 2012
I like them all kinds of ways
Apricots. Now I am going to talk about apricots- and how wonderful they are baked, broiled, poached, fresh, sliced, dipped in honey, and sometimes covered in caramel.
I've been told I should always bake apricots to avoid the sometimes spongy and tasteless fruit that sometimes exists in other peoples apricots. Not my apricots- or rather- not Washington apricots, fresh picked and perfectly ripe. Another fruit point for the west coast. My native pride- or state ism- is melting away. Don't tell my maple syrup man...
Anyways, as much as I've been eating fresh, tart, and raw apricots- I'd also like to talk about baking with them. Here's a secret- I crave sweets all the time, but when I bake only for myself it's kinda like I'm cooking- I get distracted, cut corners, and usually do the first thing that comes to mind. For me that's been apricots as of late. Oh, and peaches. Sliced and tossed with granulated maple sugar and lemon and covered with a very lose oat crumble. I pretend its healthy and eat it for breakfast- or sometimes as a snack in between desserts. Seriously.
I'm not going to give you this recipe because its embarrassing, but if you were to walk into my kitchen right now you would probably see some on my stove. I take that back, you would definitely find some on my stove and lucky for you I would probably share- as long as you didn't make fun of me and my makeshift cobbler.
OK I'm getting back to it. Apricots. Vanilla Buttermilk Cake. Honey Caramel Sauce. Yep, that's really all I have to say.
Except there's always more to say about caramel sauce. Growing up I was always a rainbow sprinkles gal over caramel or hot fudge. Call me simple, but there is something about rainbow sprinkles that is completely nostalgic and utterly satisfying. I digress I know, but fun fact one of my first "restaurant" jobs was at the Whippie Dip in Fairlee, VT and for two summers I dipped a lot of cones in caramel and never got the point, especially when there was the viable option of rainbow sprinkles.
But rainbow sprinkles aside, I think I get it now. That is to say, I get Caramel and how fantastic it is- rich, nutty, sweet, and salty its like the tawny port of desserts. I'm not even sure that's an apt comparison, but I said it, I'm going with it, so there you have it.
Specifically, I like apricots coated in caramel sauce. A lot. Cakes aside I could eat them with a spoon.
So here you go. To make about half a mason jar (thats a real measurement when it comes to liquid sweet things you will possibly need to store) of honey caramel sauce combine 1 cup of brown sugar and 1/2 cup of honey or granulated honey in a sauce pan on medium low heat. I prefer granulated honey because I like making caramel with less liquid and also I really like the granulated honey I buy because its especially floral, with a deep flavor and a lighter color to balance out the brown sugar.
Making caramel is kinda tricky and I often screw it up, but I am practicing and it seems to be coming along. I've found it's best to leave it alone while it begins to boil, to avoid introducing too much air into the mixture and messing up the creamy glassy nature of your finished caramel- sauce or candy. Every so often I will tilt the pan to let the sugar redistribute, but don't start stirring until the end. After it has been bubbling for sometime the mixture will start to pull away from the sides.
That's the moment I've found you really have to watch it. Its usually seconds between perfect and burnt, so at that point it's best to keep your eyes on it. Technically I believe you want the temperature at about 350 to 355 degrees, but you can also do it by sight and smell. Once the mixture reaches a uniform caramel brown (isn't the obvious) color you are probably good to go. Also, the sugars will begin to break down and the honey will smell much richer and nuttier. At this time add heavy cream and butter- both add creaminess, but the amount you add of each depends on what you want your caramel to do at room temp. Personally I did a 1/2 cup of each, but when I reheated it later after it had thickened some I added more heavy cream because I wanted more of a glaze and less of a thick sauce.
I'm not sure what I've been afraid of all these years, it's surprisingly easy, way easier than making rainbow sprinkles from scratch, that's for sure. So over ice cream, apples, peaches, or yes- raw apricots I like it, a lot.
Happy summer!
I've been told I should always bake apricots to avoid the sometimes spongy and tasteless fruit that sometimes exists in other peoples apricots. Not my apricots- or rather- not Washington apricots, fresh picked and perfectly ripe. Another fruit point for the west coast. My native pride- or state ism- is melting away. Don't tell my maple syrup man...
Anyways, as much as I've been eating fresh, tart, and raw apricots- I'd also like to talk about baking with them. Here's a secret- I crave sweets all the time, but when I bake only for myself it's kinda like I'm cooking- I get distracted, cut corners, and usually do the first thing that comes to mind. For me that's been apricots as of late. Oh, and peaches. Sliced and tossed with granulated maple sugar and lemon and covered with a very lose oat crumble. I pretend its healthy and eat it for breakfast- or sometimes as a snack in between desserts. Seriously.
OK I'm getting back to it. Apricots. Vanilla Buttermilk Cake. Honey Caramel Sauce. Yep, that's really all I have to say.
But rainbow sprinkles aside, I think I get it now. That is to say, I get Caramel and how fantastic it is- rich, nutty, sweet, and salty its like the tawny port of desserts. I'm not even sure that's an apt comparison, but I said it, I'm going with it, so there you have it.
Specifically, I like apricots coated in caramel sauce. A lot. Cakes aside I could eat them with a spoon.
So here you go. To make about half a mason jar (thats a real measurement when it comes to liquid sweet things you will possibly need to store) of honey caramel sauce combine 1 cup of brown sugar and 1/2 cup of honey or granulated honey in a sauce pan on medium low heat. I prefer granulated honey because I like making caramel with less liquid and also I really like the granulated honey I buy because its especially floral, with a deep flavor and a lighter color to balance out the brown sugar.
Making caramel is kinda tricky and I often screw it up, but I am practicing and it seems to be coming along. I've found it's best to leave it alone while it begins to boil, to avoid introducing too much air into the mixture and messing up the creamy glassy nature of your finished caramel- sauce or candy. Every so often I will tilt the pan to let the sugar redistribute, but don't start stirring until the end. After it has been bubbling for sometime the mixture will start to pull away from the sides.
That's the moment I've found you really have to watch it. Its usually seconds between perfect and burnt, so at that point it's best to keep your eyes on it. Technically I believe you want the temperature at about 350 to 355 degrees, but you can also do it by sight and smell. Once the mixture reaches a uniform caramel brown (isn't the obvious) color you are probably good to go. Also, the sugars will begin to break down and the honey will smell much richer and nuttier. At this time add heavy cream and butter- both add creaminess, but the amount you add of each depends on what you want your caramel to do at room temp. Personally I did a 1/2 cup of each, but when I reheated it later after it had thickened some I added more heavy cream because I wanted more of a glaze and less of a thick sauce.
I'm not sure what I've been afraid of all these years, it's surprisingly easy, way easier than making rainbow sprinkles from scratch, that's for sure. So over ice cream, apples, peaches, or yes- raw apricots I like it, a lot.
Happy summer!
Thursday, July 26, 2012
I was going to talk about apricots.
I have a lot of fruit. A lot. Baskets, pints, and flats of fruit. Well maybe one basket, a half-flat, and several pints, but still that's a lot of fruit. And a lot of perfectly ripe and perfectly in season fruit. I was going to talk about apricots, which is where this whole gathering of fruit started, but instead I am starting with the berries.
Yesterday I was feeling a little indulgent after my yoga class so I decided to treat myself to an insanely delicious and exorbitantly expensive raw coconut water and the latest issue of Lucky Peach. Somehow between setting my selections down on the register and paying, I picked up a half flat of fresh berries. I am still not sure how it happened, but it did.
After staring at my spoils and debating between cake or pie for a while, I decided on well- both. The raspberries and blackberries for pie and the blueberries for cake. Coffee cake to be exact.
As much as I love cookbooks and magazines, there is something to be said about the Internet and instant gratification. Or rather, virtually stumbling across just the thing you want to eat next. In this case a recipe for Huckleberry Maple Coffee Cake from 101 Cookbooks. It looked good enough to fall in love with: not too sweet, not too decadent, and perfect for breakfast or an afternoon snack. Really, the best cakes for me are cakes that you can eat at 8am and at 4pm and maybe even again sometime in between.
This is one of those cakes.
I substituted regular pastry flour for the whole wheat pastry flour that the recipe calls for and traded out the huckleberries for the blueberries from my box o' berries, but any berry would do. Honestly, I think that it would have been best with the blackberries, but I am saving those for pie.
I love a lot of things about this cake. I love that the outside gets crunchy and the inside stays juicy and soft from the berries. I love that its not very sweet. I love that it goes with coffee, or I suspect nicely with some whipped cream. I love that it makes my house smell like baked berries. But mostly I love that it reminds me of home.
A perfect New England breakfast reminiscent of bead and breakfasts and summer mornings. My only wish is that I had east coast berries. I'll give the pacific northwest the crown when it comes to blackberries, raspberries, cherries, and strawberries- but New England takes blueberries. You will never change my mind.
Lets really talk about blueberries. As a kid we had giant blueberry bushes in our back yard, at least four or five big bushes that every year produced fists full of berries that my sisters and I would eat straight from the bush. We also lived just up the road from a pick-your-own blueberry farm, so we were never without fresh blueberries in the summer and frozen in the winter. One of my favorite treats growing up was frozen berries straight from the gallon zip-lock bag. Handful after handful until our hands were frozen and stained a deep purple. If only I had more patience, I could have made a lot of blueberry maple coffee cakes....
I'm hoping my sister, who lives in vermont, will take note and make a lot of these in the very near future.
Blueberry Maple Coffee Cake
Mostly the same as here from 101 Cookbooks
1 cup pastry flour
3 tablespoons rolled oats
1/2 teaspoon baking powder
1/2 teaspoon baking soda
1/2 teaspoon sea salt
4 tablespoons (1/2 stick) unsalted butter, room temperature
1/3 cup maple syrup, room temperature
1 large egg, room temperature
zest of one lemon
2 teaspoons vanilla extract
1/4 cup buttermilk
1 1/3 cups fresh blueberries, or other berries
3 tablespoons rolled oats
1/2 teaspoon baking powder
1/2 teaspoon baking soda
1/2 teaspoon sea salt
4 tablespoons (1/2 stick) unsalted butter, room temperature
1/3 cup maple syrup, room temperature
1 large egg, room temperature
zest of one lemon
2 teaspoons vanilla extract
1/4 cup buttermilk
1 1/3 cups fresh blueberries, or other berries
For the Crumble
1/2 cup t pastry flour
4 tablespoons cold unsalted butter, cut 1/4-inch cubes
1/3 cup granulated maple sugar (or brown sugar)
1/2 cup t pastry flour
4 tablespoons cold unsalted butter, cut 1/4-inch cubes
1/3 cup granulated maple sugar (or brown sugar)
Preheat oven to 350 degrees and butter and flour a loaf pan. Whisk together flour, oats, salt, powder, and soda together and set aside. Beat butter until fluffy. Add in maple syrup and egg. Beat again. Add in lemon zest and vanilla. Beat until just combined. Add in half flour and some buttermilk. Stir. Add in the rest of the flour mixture and buttermilk and stir until just combined. Mix in 1 cup of berries. Pour batter into loaf fan.
Prepare crumble by using pulsing ingredients in food processor quickly 20-30 times. Pour over batter and and the rest of the fresh blueberries. Bake 40-50 minutes.
Let cool. Serve with coffee, whipped cream, or just a fork and a grin.
Enjoy!
Prepare crumble by using pulsing ingredients in food processor quickly 20-30 times. Pour over batter and and the rest of the fresh blueberries. Bake 40-50 minutes.
Let cool. Serve with coffee, whipped cream, or just a fork and a grin.
Enjoy!
Subscribe to:
Posts (Atom)